Step-by-Step Installation
-
1
Download DevBox Pro
Go to the GitHub Releases page and download the latest version. You have two options:
- DevBox-Pro-Setup-x.x.x.exe — the installer (recommended for most users)
- DevBox-Pro-x.x.x.exe — portable version (no installation needed, runs from any folder)
-
2
Install & Launch
Run the installer and follow the on-screen prompts. When it finishes, DevBox Pro will open automatically. The first launch may take a few seconds while it initializes — this is normal.
Windows Defender may ask you to allow network access the first time you start a web server. Click "Allow" so your projects can be accessed in the browser.
-
3
Download Your Tools (Binaries)
Before creating projects, you need to download the components you'll use. Click on "Binary Manager" in the sidebar.
You can click "Download All" to get everything, or pick and choose only what you need — for example, PHP 8.4, Nginx 1.28, MySQL 8.4, and Node.js 24.
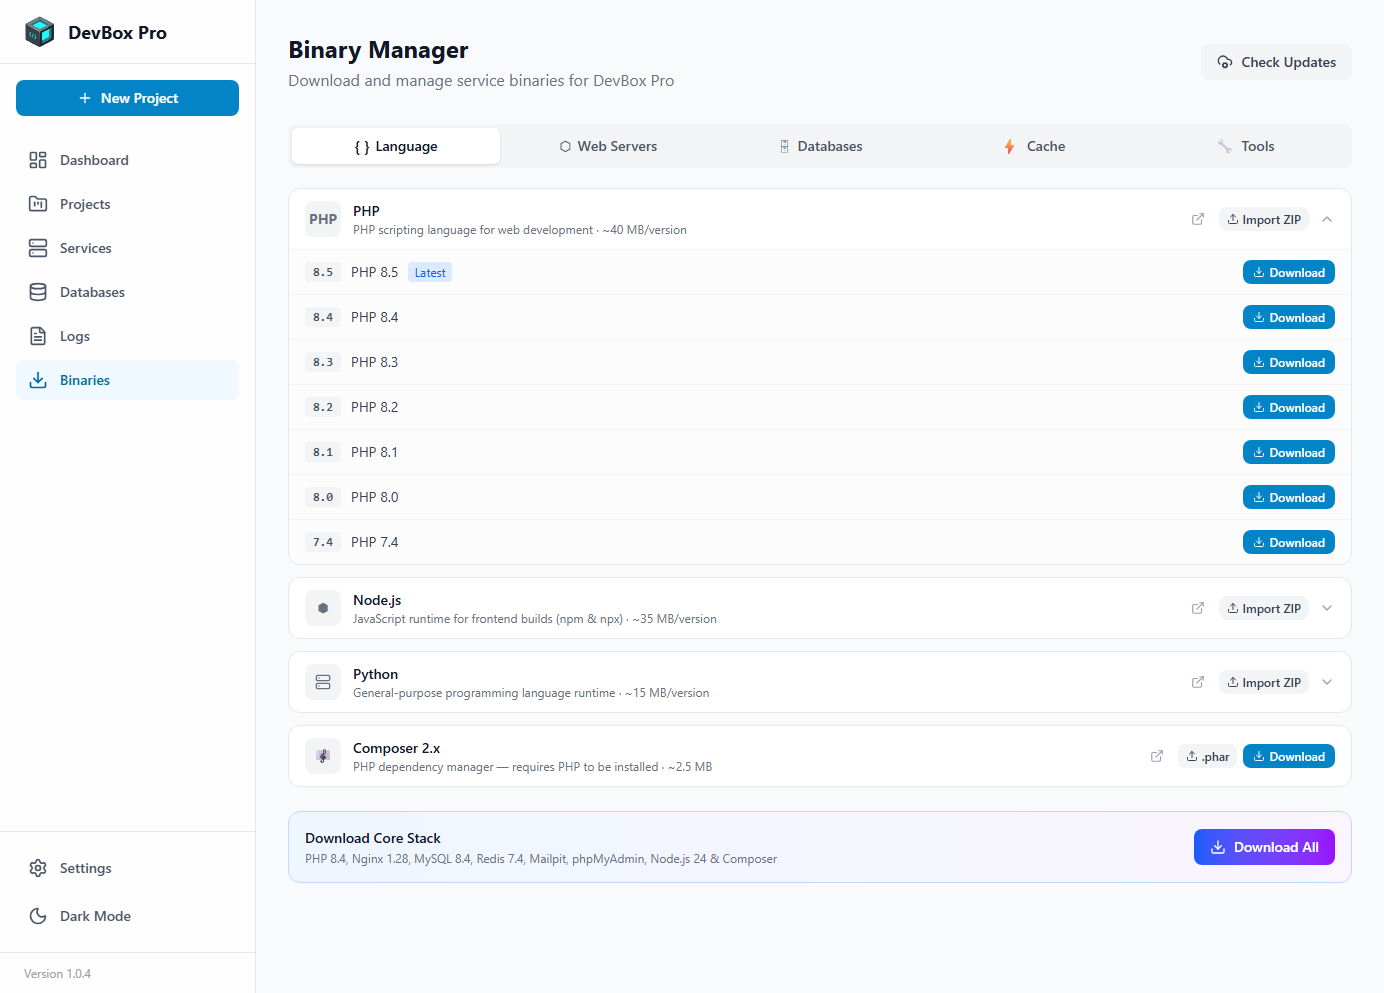 The Binary Manager — pick the versions you want to use
 -
4
Create Your First Project
Click the "+ New Project" button on the Dashboard. A dialog will appear where you can:
- ✓ Pick your project type — Laravel, WordPress, Symfony, custom PHP, or Node.js
- ✓ Choose a folder on your computer for the project files
- ✓ Select the PHP or Node.js version to use
- ✓ Pick which services to enable (MySQL, Redis, etc.)
- ✓ Set your local domain (e.g.,
myproject.test)
Click "Create" and DevBox Pro will handle the rest — installing frameworks, setting up the database, and configuring virtual hosts.
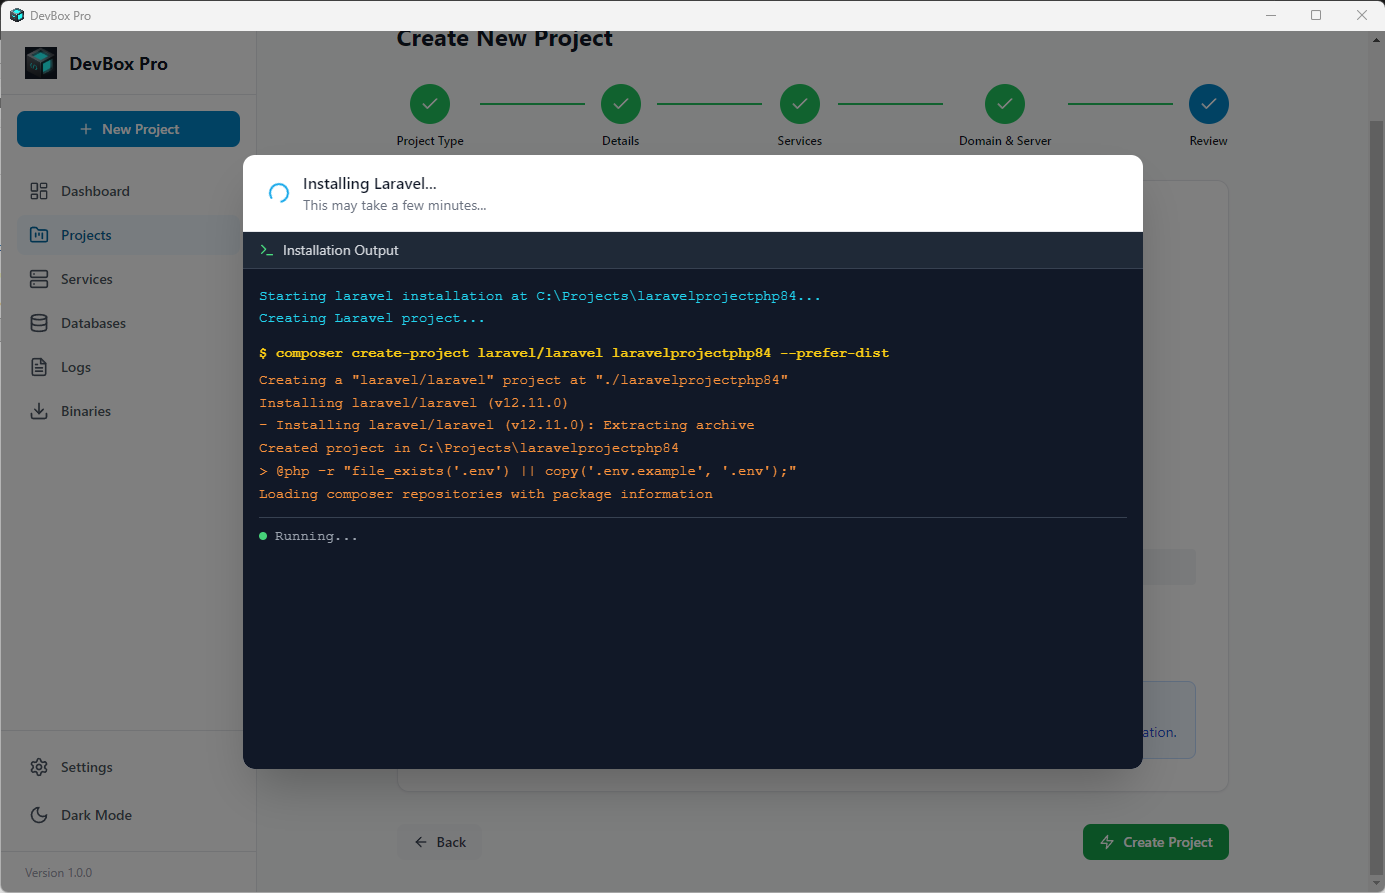 Creating a Laravel project — DevBox Pro handles every step automatically
 -
5
Open Your Project
Once the project is created, click "Start" on the project card. DevBox Pro will boot the web server and any enabled services. Then simply open your browser and go to:
https://myproject.testThat's it — your website is live on your computer! 🎉
-
6
Optional: Share It on the Internet
If you need to show the project outside your local network, download Cloudflare Tunnel or zrok from Binary Manager → Tools, then open the project detail page and enable "Share on Internet".
Choose a provider, optionally enable "Auto-start tunnel", then click "Start Sharing" to get a public URL.
Use public tunnel sharing for previews, QA, and client review. It is not intended for production hosting.